

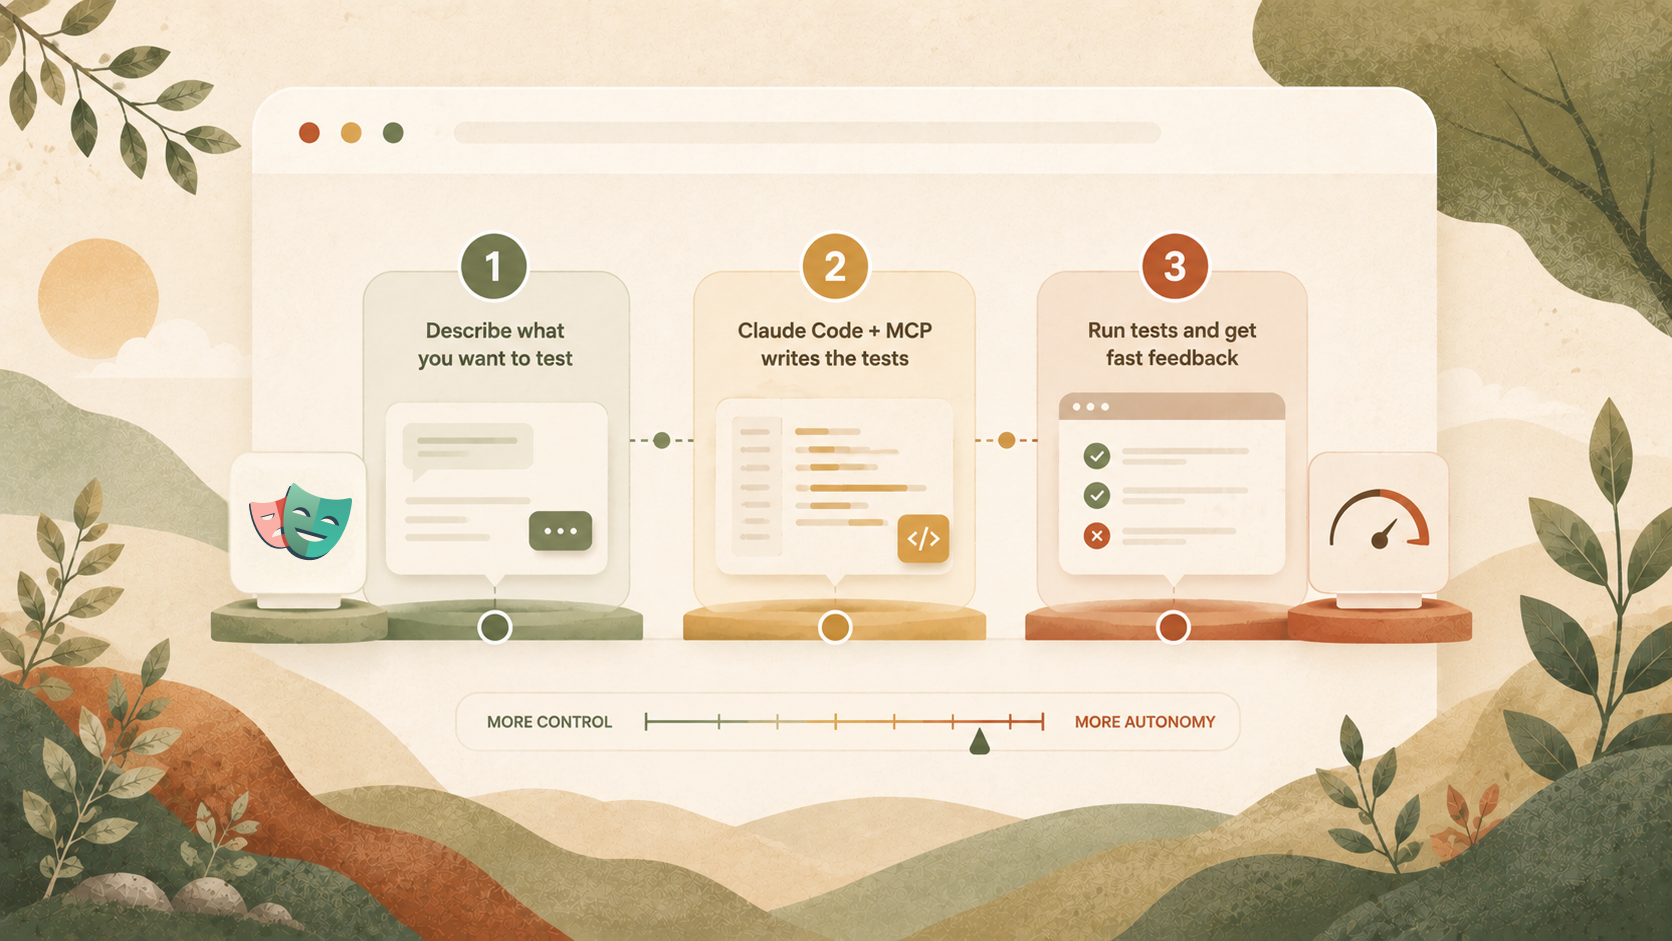
Claude Code can draft a Playwright test in minutes, and plenty of engineers have seen that same test pass locally, then fail in CI shortly afterward. One common reason why this happens is the way that language models generate locators when they cannot inspect the page. Instead of reading what the browser currently renders, they often rely on patterns learned from similar interfaces.
Flaky tests were already a costly problem before AI started writing any of them. Atlassian’s own engineering team found that flaky tests caused roughly 15 percent of failures in one of their major repositories, with the resulting reruns costing more than 150,000 developer hours a year. A locator generated without access to the live page makes a test more likely to add to that cost.
The Playwright MCP server, built on Anthropic’s Model Context Protocol, gives Claude Code access to the browser, so locators come from the current DOM instead of assumptions based on similar pages. This tutorial turns a plain-English user flow into a Playwright test that gets generated, reviewed, verified, and committed within minutes, along with a review habit for trusting the next one.
If you only need the setup, this command adds Playwright MCP to Claude Code:
claude mcp add playwright -- npx -y @playwright/mcp@latestRun claude mcp list and check that the server shows ✔ Connected.
Step 1 covers
sharing the setup with your team and fixing a server that won’t connect.
Why AI-generated Playwright tests break
When Claude Code writes an end-to-end test for checkout, the result often looks complete and passes on the first read-through. The problem shows up later, usually looking like a flaky test.
The cause traces back to how the test was written. Working from source code
without opening the application, an agent can see a submit button styled with a
class like .btn-primary in a component file and write a locator against it.
But a component library or UI logic can rewrite that class before it reaches the
browser, leaving behind a hashed string, a different DOM structure, or no
matching element at all.
The test can still appear correct because nobody has run it against the application to confirm the selector resolves on the page. CI exposes the problem as soon as it does.
The Playwright MCP server changes what the agent can work with. It gives Claude Code access to the browser, allowing it to navigate the application, inspect the accessibility tree, and write locators based on what the page exposes. That structured snapshot, not a screenshot, is what helps produce stable locators while keeping generation efficient, since the model reasons over the roles and names it can already see.
// Hallucinated: guessed from training data, does not exist on this page
await page.locator("#submit-btn").click();

// Grounded: read from the accessibility tree Claude Code can see
await page.getByRole("button", { name: "Place order" }).click();
This was never about model capability. The same model that guesses a selector from memory can write one that resolves when it has access to the browser and the accessibility tree. Getting there starts with a short checklist of what needs to be in place first.
Prerequisites
Four things need to be ready before any of the steps below will work.
-
Node.js 20 or newer. Install the current LTS release and confirm it with
node --version. The Playwright MCP server runs throughnpx, so Node.js is required regardless of how Claude Code is installed. -
Claude Code, installed and signed in. Confirm the installation with
claude --version, or set it up here if needed. -
A Playwright project. Ensure
playwright.config.tsexists at the project root, or scaffold one withnpm init playwright@latest. If you want a more realistic one you can use this tutorial test suite. -
A running application to test. This can be a local development server or a staging URL. Playwright can launch it automatically when configured to do so.
With those four confirmed, the next step is connecting Claude Code to a live browser through the Playwright MCP server.
Step 1: Connect the Playwright MCP server to Claude Code
One command registers the Playwright MCP server with Claude Code:
claude mcp add playwright -- npx -y @playwright/mcp@latestClaude Code saves this to its local configuration and starts the standalone
server process the next time a session opens. The -y flag lets npx install the
Playwright MCP server package without pausing for confirmation, and @latest
pulls the latest published version, so the first run downloads it fresh rather
than relying on an older cached copy.
That command writes to a personal, single-project config by default. When
working with a team, add --scope project instead. This writes the same entry
to a .mcp.json file at the project root, allowing everyone to connect to the
same server without repeating the setup:
{
  "mcpServers": {
    "playwright": {
      "type": "stdio",
      "command": "npx",
      "args": ["-y", "@playwright/mcp@latest"]
    }
  }
}
Confirm the connection before trusting it with anything. Run claude mcp list
and look for the server marked ✔ Connected. Right after adding it, the check
can briefly show ✘ Failed to connect while npx finishes downloading the
package in the background. Running the same command again a few seconds later
usually clears it.
If it still shows ✘ Failed to connect and retrying does not change that, the
cause is different. Claude Code launches the server as its own subprocess, with
an environment separate from your terminal’s, and that process sometimes cannot
resolve npx the same way your shell does. This shows up most often with
Homebrew-installed Node on macOS. Pointing to the binary instead of relying on
PATH resolution fixes it:
claude mcp remove playwright
claude mcp add playwright -- $(which npx) -y @playwright/mcp@latest
Check again with claude mcp list. It should show ✔ Connected before moving
on.
That status line confirms the server is running. It does not yet show Claude Code can drive the browser. Open a Claude Code session and name the tool explicitly. If the prompt does not mention Playwright MCP, Claude Code may default to a Bash command instead of the MCP server.
Using Playwright MCP, open [your app's local URL] and tell me the page title and the first heading you see.
An answer that names something specific from the page, not a guess and not a generic description, is the proof this step needs. That response comes from a live accessibility snapshot, not from memory, which is the point of connecting the server in the first place.
These commands are accurate as of August 2026. MCP tooling moves fast enough that it is worth checking the official Playwright MCP repository if a command in this guide ever stops matching what is on screen. With the server verified and talking to a live browser, the next problem to solve is authentication.
Step 2: Handle authentication with storage state
Most tests worth writing live behind a login. A checkout flow, settings page, or admin dashboard is unreachable if the agent never gets past the sign-in screen.
The Playwright MCP server does not automatically know about your project’s existing storage state. It either reuses its own browser profile between sessions or, when run in isolated mode, starts every session logged out. Either way, it is separate from the authentication flow your test suite already uses.
The solution is to start the server with an authenticated session:
npx @playwright/mcp@latest --isolated --storage-state .auth/user.json--isolated keeps the browser profile in memory instead of saving it to disk,
so each session starts clean rather than reusing data from a previous
run.--storage-state loads a known authenticated session from a file, and any
changes made during the session are discarded when it ends. Before either option
can do its job, the file needs to exist.
Playwright’s authentication guide recommends creating a dedicated setup test that logs in and saves the session:
import { test as setup } from "@playwright/test";

const authFile = ".auth/user.json";

const password = process.env.TEST_USER_PASSWORD;
if (!password) {
  throw new Error("TEST_USER_PASSWORD is not set");
}

setup("authenticate", async ({ page }) => {
  await page.goto("https://your-app.example.com/login");
  await page.getByLabel("Email").fill("test-user@example.com");
  await page.getByLabel("Password").fill(password);
  await page.getByRole("button", { name: "Log in" }).click();
  await page.waitForURL("**/dashboard");
  await page.context().storageState({ path: authFile });
});
To run that setup automatically, declare a dedicated project in playwright.config.ts and make the browser projects depend on it:
projects: [
  { name: 'setup', testMatch: /auth\.setup\.ts/ },
  {
    name: 'chromium',
    use: { storageState: '.auth/user.json' },
    dependencies: ['setup'],
  },
],
Run the setup project once:
npx playwright test --project=setupAfter it completes, .auth/user.json contains a valid authenticated session.
The auth.setup.ts file also becomes part of the test suite, so the login flow
only needs to be maintained in one place.
One addition is worth considering. If the application can create a test user through an API or seed script, create one before login and remove it afterward. Claude Code will interact with the application while exploring flows, and a disposable account avoids changing the state of a shared account someone else may be using.
With the storage state file available, update the MCP server registration to load it:
claude mcp remove playwright
claude mcp add playwright -- npx -y @playwright/mcp@latest --isolated --storage-state .auth/user.json
For team environments, add the same configuration to .mcp.json:
{
  "mcpServers": {
    "playwright": {
      "type": "stdio",
      "command": "npx",
      "args": [
        "-y",
        "@playwright/mcp@latest",
        "--isolated",
        "--storage-state",
        ".auth/user.json"
      ]
    }
  }
}
Endform’s Playwright MCP guide covers the same setup in more detail for applications with more complex authentication flows.
With Claude Code now exploring the application as an authenticated user, the next step is writing prompts that turn a plain-English user flow into a Playwright test worth reviewing and committing.
Step 3: Write the three-part prompt
This is the part of the workflow that decides whether Claude Code produces a shippable test or something to throw away. The prompt is built from three distinct parts, each with a different job, instead of one long paragraph asking for a test and hoping for the best.
The first part is environment setup, the facts about this specific app that the agent has no way to infer:
The website under test is at https://staging.yourapp.com.
You're already logged in as a test user through the storage state configured earlier.
The test user's cart currently holds one item, a placeholder t-shirt priced at $24.99.
The second part is the scenario, written the way you’d describe it to a teammate rather than as pseudocode:
# Guest checkout with a saved card
1. Open the cart page.
2. Proceed to checkout.
3. Confirm the shipping address shown is the default one.
4. Select the saved Visa card ending in 4242.
5. Place the order.
6. Confirm the order confirmation page shows an order number and the correct total.
Save this as its own markdown file in the repository, alongside the tests it describes, instead of keeping it only in a chat window. Playwright Test Agents follow the same convention. A planner produces the scenario as markdown first, and a separate step turns it into code. It’s a useful habit to adopt here as well.
This is also the one part of the prompt no one else on the team can write as well as the reader can.The environment setup only states facts about the app, and the system prompt described next is reused across every test. Neither requires the kind of judgment the scenario does.
The scenario carries the assumptions that shape the flow: whether the address should be confirmed before payment, whether the saved card matters more than a new one, and whether the total on the confirmation page is worth checking beyond the page simply loading. An agent cannot tell which details matter and which are incidental. That judgment has to come from someone who understands the product.
The third part is a system prompt, standing instructions that stay the same across every test this generates, telling the agent what a good test looks like rather than only what to do:
You are a Playwright test generator.
Explore the app using the Playwright MCP tools before writing any code, don't generate steps from assumption alone.
Prefer getByRole, getByLabel, and getByTestId locators over CSS selectors or XPath.
Don't add manual waitForTimeout calls, rely on Playwright's built-in auto-waiting and retrying assertions instead.
Group related steps with test.step for readability in the trace viewer.
Assert on outcomes a user would actually see, not on incidental implementation details.
Save the finished test to the tests directory, run it, and keep iterating until it passes.
Writing this from scratch isn’t necessary. Debbie O’Brien, a longtime Playwright advocate and former member of Microsoft’s Playwright team, maintains a public collection of prompt files built for this purpose, a stronger starting point than reinventing the same instructions.
Put together, this is what actually gets sent to Claude Code:
You are a Playwright test generator.
Explore the app using the Playwright MCP tools before writing any code, don't generate steps from assumption alone.
Prefer getByRole, getByLabel, and getByTestId locators over CSS selectors or XPath.
Don't add manual waitForTimeout calls, rely on Playwright's built-in auto-waiting and retrying assertions instead.
Group related steps with test.step for readability in the trace viewer.
Assert on outcomes a user would actually see, not on incidental implementation details.
Save the finished test to the tests directory, run it, and keep iterating until it passes.

The website under test is https://staging.yourapp.com.
You're already logged in as a test user through the storage state configured earlier.
The test user's cart currently holds one item, a placeholder t-shirt priced at $24.99.

# Guest checkout with a saved card
1. Open the cart page.
2. Proceed to checkout.
3. Confirm the shipping address shown is the default one.
4. Select the saved Visa card ending in 4242.
5. Place the order.
6. Confirm the order confirmation page shows an order number and the correct total.
That sequence is the first genuine evidence this prompt is doing its job. A system prompt that says explore first is only worth writing if the agent follows it, and this is the moment that proves it rather than assumes it. Three parts, three jobs, one message. The next step is generating the test from that prompt.
Step 4: Generate the test
Claude Code doesn’t stop exploring after a first look at the page. It keeps navigating and reading through Playwright MCP until it has seen the elements the scenario describes. That’s the difference between this workflow and asking a model to write a test from a plain-English description alone.
Watching this happen makes the order of operations obvious. Claude Code opens the page, clicks through the steps described in the scenario file, and reads back what each one returned before writing a single assertion. Only after walking through that sequence does it write the spec, and even then it runs the test and keeps adjusting until it passes rather than handing back untested code.
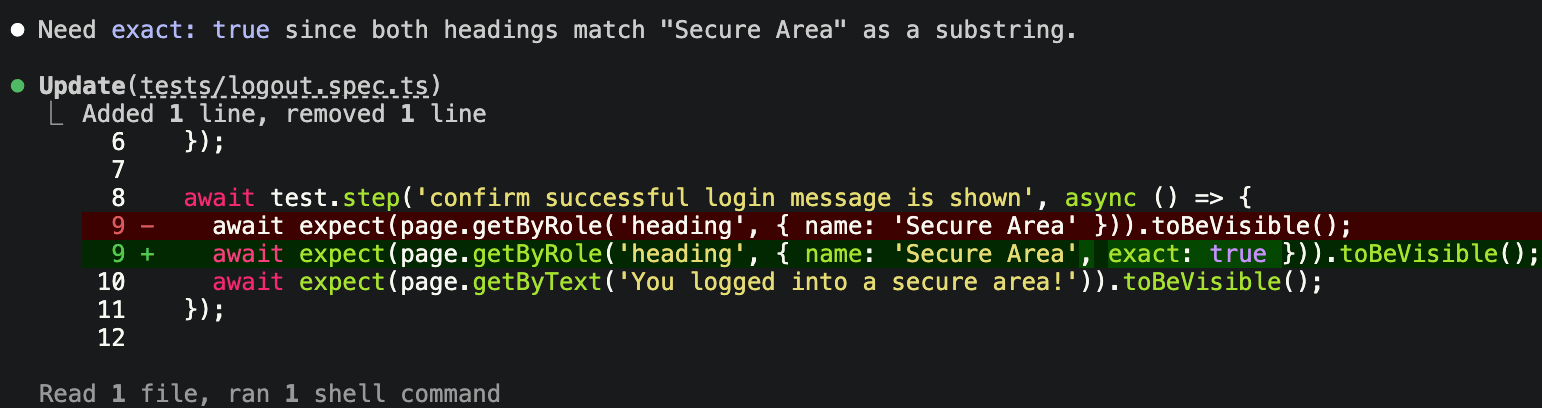
Your own run of the logout scenario produced exactly that. Two headings on the
page both matched “Secure Area,” and Playwright raised a strict mode violation
because a locator intended for a single-element action resolved to multiple
matches. Claude Code read the error, identified the cause, and added exact: true so the locator required the full heading text rather than a partial match.
The fix happened in the same iteration, without any intervention from you.
A checkout flow involving a cart, saved card, and order confirmation would generate the same way, step by step, until it passes. Here’s a second worked example on a different flow to show the approach holds beyond a single scenario.
Endform’s guide to shipping quality end-to-end tests with Playwright MCP uses a scenario worth borrowing here: confirming that a new team appears in an activity log. The scenario, sign in, confirm the log already shows a signup event, create a team, and verify the new event appears, comes from that post. Endform describes the scenario and the review process, not the finished code, so what follows is a realistic test built around that flow, written the way Claude Code would produce it against a live application:
import { test, expect } from "@playwright/test";

test("new team activity appears in the activity log", async ({ page }) => {
  await test.step("open the activity log", async () => {
    await page.goto("https://staging.yourapp.com/dashboard");
    await page.getByRole("link", { name: "Activity" }).click();
  });

  await test.step("confirm the signup event is already logged", async () => {
    await expect(page.getByText("you signed up")).toBeVisible();
  });

  await test.step("create a new team", async () => {
    await page.getByRole("button", { name: "Create a new team" }).click();
    await page.getByLabel("Team name").fill("QA Playground");
    await page.getByRole("button", { name: "Create team" }).click();
  });

  await test.step("confirm the new team event appears in the log", async () => {
    await expect(page.getByText("you created a new team")).toBeVisible();
  });
});
Now our test file is much more intentional. The link and button names match text Claude
Code read from the page. The test.step blocks mirror the scenario structure,
so a failing run points straight to the step that broke. There are no manual
waits because Playwright’s retrying assertions handle the timing.
What comes out of this step is a working, runnable file. It passes on a first run more often because every locator was checked against the page before the test was written. It still deserves a careful review before it ships. A passing run and a good test are not always the same thing, and the next step focuses on that review.
Step 5: Review the test before it ships
A test that passes once is not automatically a test worth keeping. Two review passes catch what a quick glance misses: one on the code, the other on whether the test still means what it was written to prove.
The first pass reviews the code. Read what got generated and ask whether you’d have written it this way. Agent-generated scripts often come out more complicated than necessary, with extra steps, redundant checks, or logic that could be simplified. Trimming that is usually the first useful thing to do.
Check locators against the priority already established, with getByRole and
getByTestId preferred over CSS selectors or XPath. Replace anything fragile,
and confirm every assertion verifies something meaningful rather than simply
showing that an action completed without error. The test.step grouping should
also match how a person would describe the flow.

The second pass matters even more, and no linter can do it for you. Read the scenario beside the finished test and ask whether the behavior being verified still matches the intent of the scenario, rather than only whether the test passes.
A generated test can drift here without looking obviously wrong. During your logout test, Claude Code discovered that the login banner appeared only once and was consumed by the stored session. It then changed the assertion to target the permanent heading before finishing the test. That adjustment happened during generation rather than review, which is why this pass still matters. The same issue may not be caught automatically the next time.
Writing the first version of a test becomes much faster, while refinement becomes the place where engineering judgment matters most. That refinement comes from understanding the product, the risk being tested, and what the scenario is supposed to prove. After both passes are complete, the test is ready for one final check before it ships.
Step 6: Verify and commit
The commands below use the logout test from this tutorial as an example. Even after a test passes during generation, it has not earned trust yet. Run it again outside the generation loop against the application:
npx playwright test tests/logout.spec.tsOne passing run says very little about reliability. Run it several times back to back:
npx playwright test tests/logout.spec.ts --repeat-each 5--repeat-each runs the same test multiple times in a single invocation. It is
one of the quickest ways to expose a test that passes most of the time but fails
occasionally, the kind of flakiness that often appears only after reaching CI.
Once those repeats come back clean, commit the test alongside the markdown scenario that describes it:
git add tests/logout.spec.ts tests/scenarios/logout.md
git commit -m "Add logout test with scenario spec"
Keeping the scenario in the same commit helps preserve intent alongside implementation. Someone reading the diff later can see what the test was written to prove, not only what it checks.
Before making that first commit, inspect .gitignore. A freshly scaffolded
Playwright project ignores playwright/.auth/ by default, which is Playwright’s
conventional location for storage state files. This setup writes to .auth/ at
the project root instead. Since those are different paths, the default rule does
not cover the session file, and a working, authenticated session can end up
committed by accident.
Add the correct path before that first commit:
echo ".auth/" >> .gitignoreThat single line keeps an authenticated session out of repository history rather than just avoiding it by chance.
With the test verified, stable across repeated runs, and committed alongside its scenario, the workflow has produced a dependable addition to the repository. The next challenge is handling flows that are longer, data that changes between runs, and authentication that goes beyond a simple login form.
Where this workflow can break
Trust comes from naming where Claude Code struggles, not just where it succeeds. Four things break this workflow reliably.
Long multi-step flows
The agent can lose track of a flow as it grows longer. Each step works from a fresh accessibility snapshot rather than the full sequence that came before, and extended MCP sessions losing browser context is a documented issue. Breaking a flow into smaller scenarios and composing them later is usually more reliable.
Dynamic data
The agent often writes assertions against what it observed while generating the test, a timestamp, an order ID, or a count. Those values may be different on the next run. Assertions hold up better when they target stable outcomes, such as a confirmation state, a successful action, or the presence of a result rather than the exact value observed at generation time.
Deep conditionals
The agent only sees the branch it follows while generating a test, whether that is a particular user role, account state, or feature flag. Paths it never visits remain outside its view. Prompting each branch separately, or handling the conditional logic yourself, produces more reliable coverage than expecting a single pass to discover every path.
OAuth and third-party auth
This is usually the first wall a reader hits. Redirect flows through Google,
Microsoft, or another identity provider leave the application, and the agent’s
control loop isn’t built to continue through those transitions. One developer
automating GitHub’s OAuth login got a temporary IP ban for
it. Google and other
identity providers can respond to automated login attempts in similar ways,
which makes this part of the workflow inherently fragile. The fix is to
authenticate in a separate setup step, save the session with storageState, and
generate tests against an application that starts in an authenticated state.
These limitations don’t reduce the workflow’s value. They mark where a scenario needs preparation before it’s ready to hand over.
What’s next: Keeping a growing suite fast
This tutorial started with a test that looked complete and broke in CI anyway. Claude Code explored the application through Playwright MCP, verified what was on the page, and produced a test that was reviewed, verified, and committed.
That shift changes how teams approach test creation. When writing a trustworthy test takes minutes instead of hours, teams create more of them, and growing suites introduce a different challenge. The tests still need to run in CI, and as coverage expands, the bottleneck shifts from writing tests to keeping execution fast and reliable.
Endform runs each Playwright test on its own isolated machine in parallel, helping teams keep suite duration predictable as more tests are added.
FAQ
What is the Playwright MCP server and how does it work with Claude Code?
The Playwright MCP server gives Claude Code access to a browser during test generation. Claude Code can navigate pages, inspect the accessibility tree, and interact with the application before writing a test. One command connects the two:
claude mcp add playwright -- npx -y @playwright/mcp@latestWhat is the difference between Playwright MCP and the Playwright CLI?
This is actually slightly confusing, as there are two Playwright CLIs. There’s the CLI that is bundled with the test runner framework, and then there’s a separate project explicitly called Playwright CLI. The one that is bundled with the test runner framework runs and manages test files that already exist through commands such as npx playwright test and npx playwright codegen. Playwright MCP helps earlier in the workflow by allowing Claude Code to explore an application and generate the initial test. The one called Playwright CLI is more similar to Playwright MCP in that it allows an agent (or a person) to control a browser directly, but through CLI commands instead of MCP.
Can Playwright MCP generate Playwright test code, or does it just run tests?
Playwright MCP provides browser access and tooling. Claude Code uses those tools to generate the test code. The result is a standard .spec.ts file that runs like any other Playwright test.
Does Playwright MCP work in CI?
Playwright MCP is designed for interactive exploration and test generation. The tests it produces run in CI through the normal Playwright workflow using npx playwright test, without requiring the MCP server.
When should I use Playwright MCP instead of writing Playwright tests manually?
Playwright MCP works well for turning a user flow into a new test, especially for authenticated applications. Long, multi-step flows work better broken into smaller scenarios first, rather than generated in one pass. Manual editing is often faster for small updates or simple assertions. Either approach still benefits from the same review process before a test is committed.