A practical Playwright setup
In this part of the tutorial, we will set up a Playwright project from scratch and learn to use the most important features for being more productive with Playwright in a real-world application.
Some Playwright features we will cover include:
- Automatically creating and deleting test users
- Using
storageState - Playwright projects & global setup
Let’s get started!
Create the base file structure
Section titled “Create the base file structure”Initializing with create playwright
Section titled “Initializing with create playwright”Following the Playwright documentation, let’s set up our base Playwright file structure.
pnpm create playwrightFollow the wizard. You should now have a playwright.config.ts file and a tests directory.
Modifying playwright.config.ts for our needs
Section titled “Modifying playwright.config.ts for our needs”Take a look at the playwright.config.ts file - it’s the primary way of configuring Playwright.
Peruse the docs for more information about the different options that are available here.
Let’s modify the baseURL to point to our application.
export default defineConfig({ use: { // If you want to run tests against the pre-deployed application baseURL: "https://endform-playwright-tutorial.vercel.app", // If you want to run tests against a locally running application // baseURL: "http://localhost:3000", },});At the moment the Playwright project is configured with three projects that test against three different browsers. Let’s simplify this by just testing against Chrome for now.
projects: [ { name: "chromium", use: { ...devices["Desktop Chrome"] }, }, // Remove the other Firefox and WebKit projects];Run your first test
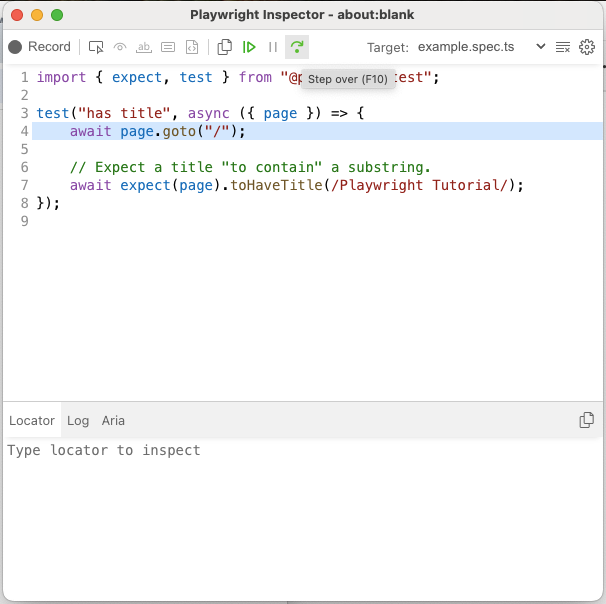
Section titled “Run your first test”Let’s check that this works by modifying the example.spec.ts test file in the tests directory.
- Remove the second test “get started link”
- Modify the first test to go to the default URL
await page.goto("/") - Modify the expectation to check for our page title
/Playwright Tutorial/ - Watch your test run
pnpm playwright test --debug
You can watch your test step by step by using the “step over” button.
Alternatives for creating temporary test data (like users)
Section titled “Alternatives for creating temporary test data (like users)”Almost all of the tests that you will end up making will require some amount of initial test data, so that you don’t have to completely re-create the world within each separate test.
There are two schools of thought about how to create this test data. Either you can create it by using the browser and clicking through your application to create that data, or you can use either your public API or create internal APIs in order to create this data more efficiently.
Playwright has two methods of globally setting up test data before your suite runs: project dependencies, which run a browser, or global setup, which is more like a simple script better suited to API calls.
If we look at Playwright’s documentation, we can see that it slightly prefers using project dependencies to globally set up and tear down test data. The table in the documentation there outlines how using project dependencies provides more visibility into how the setup and teardown steps work.
In our experience, having an API endpoint available to create data (like test users), instead of requiring a whole browser, makes your Playwright project more flexible long term. Initially you will feel like one user is enough, in which case the browser-based setup method is the simplest. However, further down the line, you will likely need to make several users, some for cases where users collide such as your “delete user” flow. When this happens, you will find that your API endpoints will make it much easier to create these tests.
If you learn to create and use API endpoints like this, it will be much easier for you to extend them to create more kinds of useful test data, such as organizations or organization memberships. This will really take your ability to test your application end-to-end to a whole new level.
Today we will learn to use both kinds of setup approaches.
Setup & teardown with Playwright project dependencies
Section titled “Setup & teardown with Playwright project dependencies”First let’s make the test files for setup and teardown:
bash touch tests/setup.spec.ts tests/teardown.spec.ts
tests/teardown.spec.ts ```</TabItem></Tabs>
For us to use project dependencies to declare our setup and teardown steps, we need to make more modifications to our `playwright.config.ts` file.
<Tabs><TabItem label="Hint">```tsexport default defineConfig({projects: [  {    // A setup project that defines its teardown    // Match only the setup test  },  {    name: "chromium",    use: { ...devices["Desktop Chrome"] },    // Ignore setup/teardown files    // Depend on the setup project  },  {    // A teardown project    // Match only the teardown test  },],});
export default defineConfig({ projects: [ { name: "setup", testMatch: "setup.spec.ts", teardown: "teardown", }, { name: "chromium", use: { ...devices["Desktop Chrome"] }, testIgnore: ["setup.spec.ts", "teardown.spec.ts"], dependencies: ["setup"], }, { name: "teardown", testMatch: "teardown.spec.ts", }, ],});We’ll talk more about generating tests in the next step, so here’s the completed setup / teardown and modified example tests to copy for now.
import { expect, test } from "@playwright/test";
const authFile = ".auth/shared-ui-user.json";
test("user signup and login flow", async ({ page }) => {const randomEmail = `${Math.random().toString(36).substring(2, 15)}@example.com`;const testPassword = "testpassword123";
    await test.step("navigate to signup page", async () => {      await page.goto("/sign-up");      await expect(        page.getByRole("heading", { name: "Create your account" }),      ).toBeVisible();    });
    await test.step("fill signup form and submit", async () => {      await page.getByRole("textbox", { name: "Email" }).fill(randomEmail);      await page.getByRole("textbox", { name: "Password" }).fill(testPassword);      await page.getByRole("button", { name: "Sign up" }).click();    });
    await test.step("verify successful signup redirects to dashboard", async () => {      await expect(page).toHaveURL("/dashboard");      await expect(        page.getByRole("heading", { name: "Team Settings" }),      ).toBeVisible();      await expect(page.getByText(randomEmail)).toBeVisible();    });
    await page.context().storageState({ path: authFile });
});
import { expect, test } from "@playwright/test";
test("delete current user account", async ({ page }) => { const testPassword = "testpassword123";
await test.step("navigate to security page", async () => { await page.goto("/dashboard/security"); await expect( page.getByRole("heading", { name: "Security Settings" }), ).toBeVisible(); });
await test.step("delete account with password confirmation", async () => { await page .getByRole("textbox", { name: "Confirm Password" }) .fill(testPassword); await page.getByRole("button", { name: "Delete Account" }).click(); });
await test.step("verify redirect to sign-in page after account deletion", async () => { await expect(page).toHaveURL("/sign-in"); await expect( page.getByRole("heading", { name: "Sign in to your account" }), ).toBeVisible(); });});import { expect, test } from "@playwright/test";
test("has title", async ({ page }) => {await page.goto("/");
await expect(page).toHaveTitle(/Playwright Tutorial/);
});
test("is already logged in", async ({ page }) => {await page.goto("/dashboard");
await expect( page.getByRole("heading", { name: "Team Settings" }), ).toBeVisible();
});Using storageState to use the authenticated user in multiple tests
Section titled “Using storageState to use the authenticated user in multiple tests”Running the tests at the moment will break, since we haven’t asked Playwright to use the authenticated user state in the other tests.
To do this, we need to modify our playwright.config.ts file to use the storageState option:
export default defineConfig({ projects: [ { name: "setup", // does not need the storage state, makes it }, { name: "chromium", use: { // Add this to your existing use configuration storageState: ".auth/shared-ui-user.json", }, }, { name: "teardown", use: { // needs the storage state to delete the user storageState: ".auth/shared-ui-user.json", }, }, ],});Creating / deleting users through an API
Section titled “Creating / deleting users through an API”Let’s explore the alternative to creating users through the browser, which is to create and use API endpoints for our test data.
Let’s make ourselves an internal API endpoint for our tests to use.
git checkout origin/stage-1-setup -- app/api/internal/user/route.tsThis file contains a POST and DELETE endpoint for creating and deleting users.
function isAuthorized(request: Request) {  const authHeader = request.headers.get("authorization");  if (!authHeader) return false;  const [scheme, token] = authHeader.split(" ");  return scheme === "Bearer" && token === "VerySecretDummyToken";}
export async function POST(request: Request) {  if (!isAuthorized(request)) {    return new Response("Unauthorized", { status: 401 });  }
  // Create user in DB}
export async function DELETE(request: Request) {  if (!isAuthorized(request)) {    return new Response("Unauthorized", { status: 401 });  }
  // Delete user from DB}
Let’s set up a global setup and global teardown script to use these API endpoints.
First we need to modify the playwright.config.ts file.
export default defineConfig({ globalSetup: "./global-setup.ts", globalTeardown: "./global-teardown.ts",});Then we need to create the global-setup.ts and global-teardown.ts files.
bash touch global-setup.ts global-teardown.ts
global-teardown.ts ```</TabItem></Tabs>
Can you figure out what these scripts should contain?
Here's an outline of the setup script:
<Tabs><TabItem label="global-setup.ts (Hint)">```tsimport type { FullConfig } from "@playwright/test";
export default async function globalSetup(config: FullConfig) {const { baseURL } = config.projects[0]?.use || {};if (!baseURL) {  throw new Error("baseURL is required");}
// Create a random email and password
// Make a POST request to the API to create a userawait fetch(`${baseURL}/api/internal/user`);
// Save the user to the storage state// The response contains a JSON object with the form:// { user: { id: number, email: string }, session: string }// Look at your existing .auth/shared-ui-user.json file to see how to save the user to the storage state// Save it to the .auth/api-user.json file so that we can use both states
}
import fs from "node:fs";import type { FullConfig } from "@playwright/test";
export default async function globalSetup(config: FullConfig) { const { baseURL } = config.projects[0]?.use || {}; if (!baseURL) { throw new Error("baseURL is required"); }
const email = `${Math.random().toString(36).substring(2, 15)}@example.com`; const password = "testpassword123";
try { const response = await fetch(`${baseURL}/api/internal/user`, { method: "POST", headers: { "content-type": "application/json", authorization: "Bearer VerySecretDummyToken", }, body: JSON.stringify({ email, password }), }); const data = (await response.json()) as { session: string }; if (!data.session) { throw new Error("Failed to create user"); }
writeSessionFile(data.session, baseURL); } catch (error) { console.error("[globalSetup] error creating user:", error); }}
function writeSessionFile(session: string, baseURL: string) { fs.writeFileSync( ".auth/api-user.json", JSON.stringify({ cookies: [ { name: "session", value: session, domain: new URL(baseURL).hostname, path: "/", // Playwright will delete the cookie when the test is done expires: -1, httpOnly: true, secure: true, sameSite: "Lax", }, ], origins: [], }), );}Here’s an outline of the teardown script:
import type { FullConfig } from "@playwright/test";
export default async function globalTeardown(config: FullConfig) {  const { baseURL } = config.projects[0]?.use || {};  if (!baseURL) {    throw new Error("baseURL is required");  }
    // Make a DELETE request to the API to delete the user    await fetch(`${baseURL}/api/internal/user`);
}
import type { FullConfig } from "@playwright/test";
export default async function globalTeardown(config: FullConfig) { const { baseURL } = config.projects[0]?.use || {}; if (!baseURL) { throw new Error("baseURL is required"); }
// How to get the email of the test user? const email = "pw-global@example.com";
try { const response = await fetch(`${baseURL}/api/internal/user`, { method: "DELETE", headers: { "content-type": "application/json", authorization: "Bearer VerySecretDummyToken", }, body: JSON.stringify({ email }), }); const data = await response.json().catch(() => null); console.log("[globalTeardown] delete user status:", response.status); console.log("[globalTeardown] delete user body:", data); } catch (error) { console.error("[globalTeardown] error deleting user:", error); }}Don’t forget to modify the playwright.config.ts file to use the new storageState file. Then try running your tests again to make sure everything is working.
export default defineConfig({ projects: [ { name: "chromium", use: { // Change the storageState path to use the API-created user storageState: ".auth/api-user.json", }, }, ],});Wrapping up
Section titled “Wrapping up”At this point, we don’t just have a basic Playwright project set up, but we have a very practical Playwright setup for our future testing needs.
We have:
- A file structure and config file for running a Playwright suite in TypeScript
- A set of projects that depend on each other where we can create shared test data
- API endpoints for easily creating more test data when needed